Follow Us!

***New Here? We would love to have you back! Don't forget to become a follower so you don't miss any fun new posts!***
Showing posts with label diy. Show all posts

Saturday, December 10, 2011

Starburst mirror update!

Hi. I cant believe it has been so long since i posted! Ahh I totally missed November! I have been really busy with making dinosaur hoodies. I should be back to posting a little more now that I am caught up on holiday orders.

We bought a new couch this week so I am working on updating our living room.We are also expecting some guests tomorrow for an early Christmas celebration!  I have my first pie in the oven right now! I decided to go with pumpkin because it is my favorite and I already had all the ingredients. I am making fajitas for dinner tomorrow which is also one of my favorites! I hope to post about that this coming week with some new recipes.


I needed a piece of artwork or something to hang above our new couch so I decided to move the starburst mirror I made from the back porch. I also updated it by adding more little mirrors to it. I love the way it sparkles with the christmas tree in lit! ( I couldn't really get a good picture to do it justice but it really brings a lot of light into the room.) You may remember seeing it before in this post.  

I have a few other projects I want to complete for this room. I am hoping to make dye and stencil the existing white curtains, paint the room grey, stencil an area rug and paint the steamer trunk white. I know that is a lot but that's kind of how my brain works so we will see how it goes!  And I will post updates as I complete projects!
Here is some fun pinspiration for you!


Thanks for stopping by!!

Sunday, September 18, 2011

{Before & After}: Patio Furniture


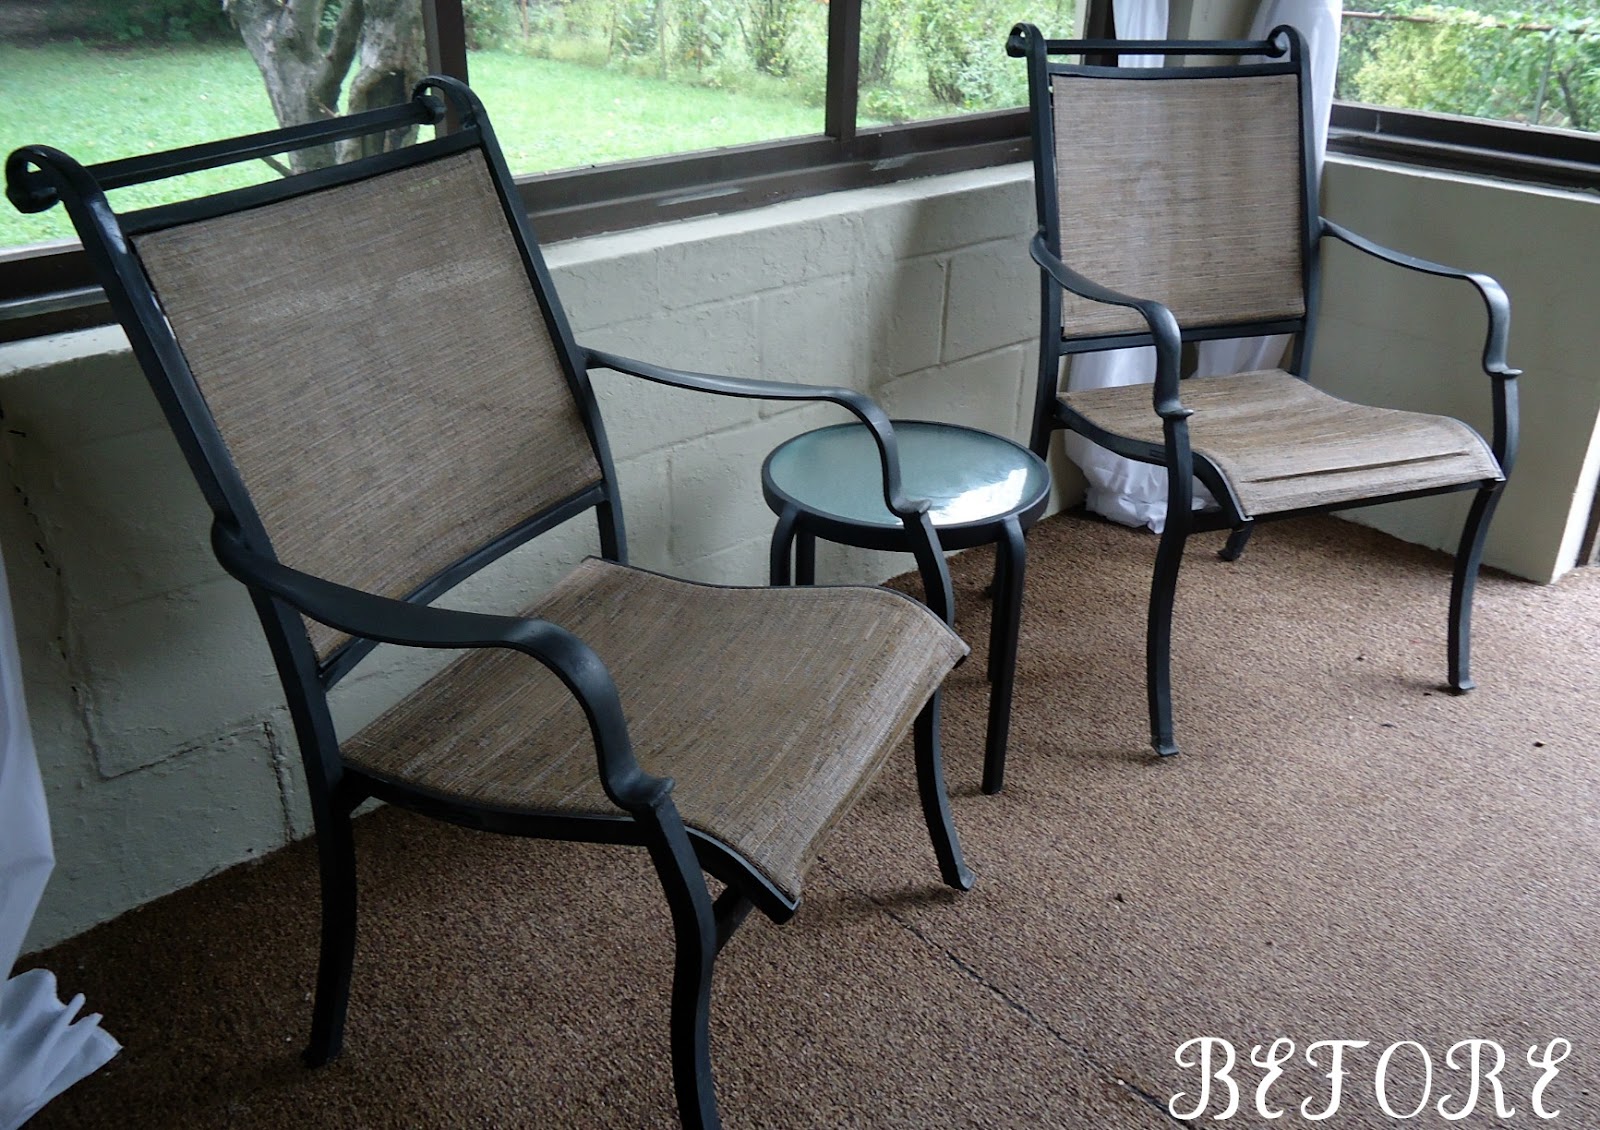
 As part of my screened porch makeover project i decided to update our old patio furniture instead of buying new. Sometimes its best to work with what you've got!

We've had our patio chairs for about 4 years now. And before they were given to us they were my mother in laws for quite some time. They are really sturdy and comfy they just needed a little TLC. So I got to work and cleaned, sanded and spray painted them. Inspired by the lovely couple at young house love I decided to go with oil rubbed bronze or "ORB".


And just for fun...another before and after with different table decor!


I also made these cute little fabric pumpkins. I followed the tutorial on thompson family blog. I had plans to make a whole bunch of these and use up some of my scraps but so far I've only done two. Maybe I will get to them later....maybe not. I have a lot of things I am working on right now!


I am so happy with the way the chairs look now. I was worried about painting the fabric area but it turned out just fine. It is a little late on the year to be updating outdoor furniture but we moved at the end of June so I didn't really get a chance to do it earlier. And now our chairs will be fresh and new when we get them out in the spring!

Thanks for stopping by!

Linking up to.....
craftaholicsanonymous

Monday, September 12, 2011

Fluffy Fall Wreath Fun

I tackled a serious beast of a project this weekend. You might not think a wreath would take all that long to make but this thing is made up of about 400 felt circles. I am so glad I did it though! I love the way it looks hanging on the front door (which I want to paint a fun color now that I have drawn attention to it). This wreath is not an original idea I have seen lots of pictures of them floating around blogland and pinterest. I love the way this wreath looks and in my opinion it is totally worth all the time I put into it.

I used the fluffy felt wreath tutorial from Kristen @ Domestifluff found here.


Hope this inspires you to create some fall decor of your own. I have lots more fall projects in the works and will be posting them when they are finished!


Like this project....
Pin It

Monday, September 5, 2011

Jute Twine Pendant Lamps

I embellished these plain white lamp shades I got at the thrift store (for .99 cents a piece) with some jute twine and hot glue. I think they turned out really great and they will coordinate well with all of the fall projects I am planning. I have recently been working on decorating and cozying (sure that's a word) up or screened back porch. It has a lovely view of the big trees in the back of our yard and should be really nice when the leaves change this fall. So far I have added furniture we already had. Spray painted some furniture and accessories. Hung curtains and now hung and embellished these lamp shades. I plan on posting pictures of the finished project with some before and afters when the porch is complete.

It was kind of difficult to get good pictures showing what I was doing but here it goes....


 I just started at the top of the shade and hot glued the twine down. Once I got started I put a line of glue under the line I just did then wrapped the twine over the glue. And glued and wrapped and glued and wrapped and glued and wrapped. I decided to just do a big section at the top and a smaller section at the bottom.

 I used the glue gun to push the twine into the glue so I didn't burn myself.

 I love the way they turned out! They were super simple to make but it was really really time consuming. Hope this gives you some inspiration!

Thanks for stopping by!

 Linking up to....
skip to my lou,

Tuesday, August 9, 2011

Funky Starburst Mirror

I have been dreaming of making a starburst mirror the better part of a year now. And today I finally got around to making one!! Yay. I am so happy with it and now I am inspired to make more improvements to our screened in porch. I was originally planning on making a tutorial for it but there are already so many others out there I decided not to. I followed this tutorial I found on apartment therapy. I changed the mirror I used (I bought an 8" scalloped edge mirror from Micheals) and I didn't glue as many of the little mirrors to it. Although I think I could add about 100 more of those little bad boys! They were so much fun to glue on.


I would love to make more sunburst mirrors  am thinking a whole wall of them like this...

I also really love this one...
tutorial for it found here.

This one is amazing but may be a bit big for our current home....


Hope this inspires you to make some of your own starburst mirrors!